About Tom Braeger

Tom Braeger is the international sales and eCommerce manager at Lake Erie System's www.FastPrinters.com. He also works with his wife Analida as site manager, taste tester and food photographer for Analida's Ethnic Spoon at EthnicSpoon.com

AMT 6350 Printer Problems Solved for ADP CDK & Reynolds Systems

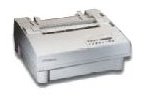
AMT 6350 for ADP CDK Reynold RR F&I Forms printing
If you have an AMT 6350 printer in use in your auto dealership operation and you know it is critical to keep this unit running.  When the printer fails, you will likely need to have a spare unit on hand or you are stuck and cannot print any paperwork for your pending deals.  We have a repair solution for you to solve printer problems you may be experiencing, and we repair these printers for dealerships all across the USA and Canada.

Here are some of the most common printing problems that occur with the AMT 6350

  • Printing too far left
  • Printing too far right
  • Paper jams
  • Printer makes a grinding noise
  • Print head grinds when moving
  • The print head slams to the left or right

Our repair facility has been repairing these AMT models for over 30 years and is ready to offer you a quick turnaround on your repair.  The most cost effective option is to buy an extra printer as a “hot spare” to swap out when your unit has a problem.  You wouldn’t drive a car without a spare tire would you?  The same holds true for your finance and insurance printer.  Why pay a monthly fee to have your printer serviced onsite when you can get a spare printer and keep it onsite for less?  We can assist in troubleshooting simple problems over the phone. Talk to us, we can give you advice on service issues and cost saving strategies.

If you have printers that need repaired, you can submit your repair request online. We will reply with an RMA number and instructions on sending in your unit. Submit your request.

If you need to purchase spare units, print heads or ribbons visit our Auto Dealer product page to place an order online.

Continue reading

Roller Kits for Dell B3460dn, B3465dn & B3465dnf Help Solve Paper Jam Problems

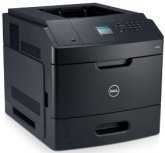
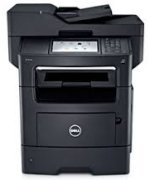
Dell B3465dnf Multifunction Printer
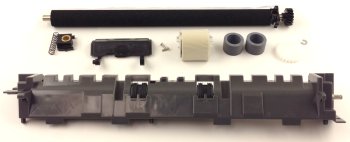
If you are experiencing paper jams in your Dell B3460dn or B3465dn we have a solution for you. We are now offering an entire roller kit for the main paper tray and multipurpose tray. If you have a high volume print environment these rollers and separation pads will need to be changed periodically to avoid paper jams and you can get all in one convenient kit. Here are the details on the kit and the contents.
You can order roller kits for your Dell Printer online at FastPrinters.com.

QSP-AKP5012 - ROLLER KIT FOR DELL B3460 B3465 0D88C TRANSFER ROLL FXK58 ROLLER, MPF PICK ROLLER AND SEPARATOR K5R2T SEPARATOR ROLL ASSEMBLY WYJFK PICKUP TIRES DELL B3460 B3465 2 PACK
Kit Part Number:  QSP-AKP5012 – ROLLER KIT FOR DELL B3460 B3465
Contents:
Part Number: 0D88C TRANSFER ROLL
Part Number: FXK58 ROLLER, MPF PICK ROLLER AND SEPARATOR
Part Number: K5R2T SEPARATOR ROLL ASSEMBLY
Part Number: WYJFK PICKUP TIRES DELL B3460 B3465 2 PACK

Continue reading

Installing the Dell S5830dn Maintenance Kit with Video Instructions

Dell B5460dn printer | Printer-help.com

This video covers how to install the maintenance kit in the Dell S5830dn printer. There are also instructions on how to reset the roller kit maintenance counter.

You may see Error code 80 Maintenance Kit – end of life warning when it’s time to change the maintenance kit.

Other messages you may see are as follows:
Maintenance kit – end of life
Maintenance kit – late warning
Maintenance kit – nearly low
Roller Kit – end of life

Here are the part numbers for the full kit, fuser and individual components:

  • DELL-S5830-MK  Maintenance Kit for Dell S5830dn
  • DELL-18DVM Fuser kit
  • DELL-RRP09  Paper Pick Roller
  • DELL-PH15C Transfer Roller
  • DELL-TTTYK Separation

Continue reading

How to install the Dell B5460dn fuser maintenance kit

Dell B5460dn printer | Printer-help.com

We just released our latest how-to video installation instructions.  This video covers the Dell B5460dn and it’s very similar MFP model the Dell B5465dnf.  The covers are slightly different on the MFP model but the overall procedure is the same.  The video will help you quickly install the following parts below:


  • DELL-B5460-MK  Maintenance Kit for Dell B5460dn and B5465dnf
  • DELL-18DVM Fuser kit
  • DELL-RRP09  Paper Pick Roller
  • DELL-PH15C Transfer Roller
  • DELL-TTTYK Separation

We can also assist over the phone with technical support on installing these items. The maintenance kit can be ordered on our Dell fuser and maintenance kit page.

Get a #MaintenanceKit for your Dell B5460 and watch the #video to install it at fastprinters.com #dellprinter #fuser #printers Click To Tweet

The end of the video also shows how to perform a reset on the maintenance counter.  Here is the quick summary on resetting the counter:

  1.  Hold in the #2 and  #6 and power on the printer.
  2. Hold the keys for about 10-15 seconds while it is powering up.
  3. The config menu will appear and then arrow down to “Reset Maintenance Counter”
  4. Press “OK”  on  Reset Maintenance Counter.
  5. Arrow to “Exit Config Menu” and press “OK”
  6. The printer will reset and come back up in the ready state.

If you don’t need the full maintenance kit we also offer a roller kit for these models and
here is a store link to order:
Part #: QSP-AKP5400 — ROLLER MAINTENANCE KIT DELL B5460DN

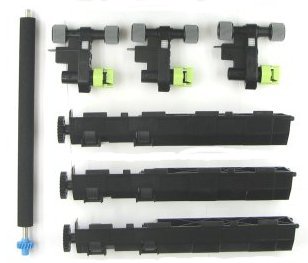
Dell B5460dn and B5465dnf roller kit

Dell B5460dn and B5465dnf roller kit

The roller kit is very easy to install and the video also covers the installation of each piece. The kit has pickup rollers and separation roller replacements for up to three trays and one transfer roller in the main unit. You want to be sure not to handle the transfer roller with your bare hands as the oil from your skin will damage to surface and possibly leave a mark on printed pages.  The transfer roller does come with a paper wrapper which is easily slipped off with a pull tab once you snap it into place.


Lexmark Pharmacy Label Printers

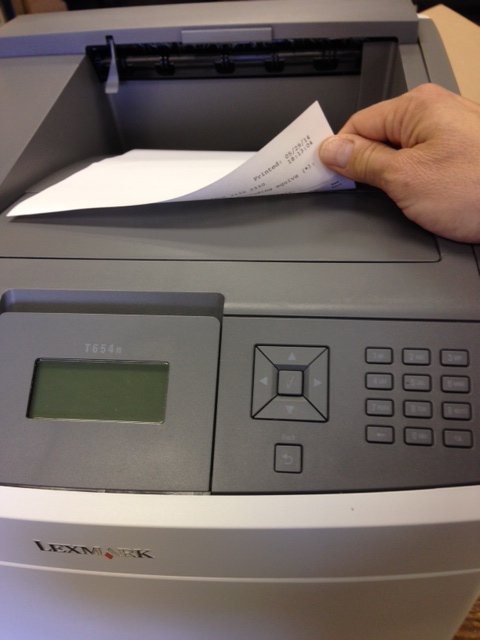
Lexmark T650 Pharmacy Label Printer

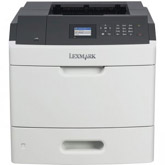
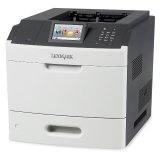
We offer new and remanufactured printers, tested to deliver the output needed for pharmacy label applications. The Lexmark MS710 and MS711 are the most current model printers for special label stock media.

Our FRN, Factory ReNewed, printers have been rebuilt with all OEM maintenance kits and offer the best pricing to expand your fleet. These FRN models are tested to meet the demands when printing on dual web labels, integrated labels, polyester labels and vinyl labels within Lexmark’s specifications.  We offer the T650n, T654n, T640n, T642n, T644n, T630n and T630n all in the FRN version.

We also offer add-on options, supplies and maintenance kits. All of our pharmacy printer’s maintenance kits have video installation instructions to make service quick and easy.

Visit our site for more details on this entire product line or call us at 1-800-570-4533.

Lexmark MS710 MS711 fuser maintenance kit and roller installation instructions

Lexmark MS710 MS711 printer
Here is a short video on how to install the MS710 and MS711 maintenance kit, fuser, roller and reset the maintenance counter.  This video covers the installation of the following Lexmark parts.  The parts are linked to our online store if you need to order them.
40X8530 maintenance kit for MS710 MS711
40X8503 fuser kit for MS710 MS711
40X7582 transfer roller
40X7593 pickup roller
40X7713 separation roller
If you see any of the following messages it’s time to install a new maintenance kit:
80 Replace maintenance kit
80 Maintenance kit — end of life
80 Maintenance kit — late warning
80 Maintenance kit — low
80 Maintenance kit — nearly low
81 Roller kit — end of life

Order these parts online at FastPrinters.com

Lexmark MS810 MS811 MS812 fuser maintenance kit and roller installation instructions

lex-40g0100
Here is a short video on how to install the MS810, MS811 and MS812 maintenance kit, fuser, roller and reset the maintenance counter.  This video covers the installation of the following Lexmark parts.  The parts are linked to our online store if you need to order them.
40X8420 maintenance kit for MS810 MS811 MS812 MX710 MX711 MX810 MS812
40X7743 fuser kit for MS810 MS811 MS812 MX710 MX711 MX810 MX812
40X7582 transfer roller
40X7593 pickup roller
40X7713 separation roller
If you see any of the following messages it’s time to install a new maintenance kit:
80 Replace maintenance kit
80 Maintenance kit — end of life
80 Maintenance kit — late warning
80 Maintenance kit — low
80 Maintenance kit — nearly low
81 Roller kit — end of life

Order these parts online at FastPrinters.com

Installing the Dell 5230n 5350dn 5530dn 5535dn fuser maintenance kit CKP5W.

Instructions on how to install the fuser, maintenance kit, transfer roller charge roller and pick tires in the Dell 5230n 5350dn 5530dn 5535dn.  This kit and procedure will resolve the 80 scheduled maintenance message.  This covers parts CKP5W, P0K6X, DELL-5230-MK, DELL-5350-MK, DELL-5530-MK, DELL-5535-MK Y47TY, T7H27, QSP-AKP5104, J4TGM.  Order these parts online at FastPrinters.com

Installing the Dell 2335dn fuser maintenance kit, adf pickup and separation pad.

Video instructions on how to install the Dell 2335 and 2335dn fuser, maintenance kit, transfer roller adf pickup and separation pad in the Dell 2335dn multifunction printer.

These parts will remedy error conditions: fuser error, low heat error, paper jam 1.
This video shows the installtion process for these parts:
DELL-KW449 2335dn Fuser Kit
DELL-KW449-MK 2335dn Maintenance Kit
DELL-KW455 — ADF PICK ROLLER 2335DN
DELL-KW462 — ADF SEPARATION PAD 2335DN


Order Dell fusers, maintenance kit and rollers here.
Dell 2335dn

My toner cartridge is leaking… but the cartridge may not be the cause.

I get this question frequently from owners of Lexmark T series printers. (T620, T630, T640 and T650 series – all types.) The most common problem with a leaking cartridge is the waste bin of the  cartridge has become full and will begin to dribble out onto the paper and all over the inside of the printer.

Let’s take a quick look at the printing process.  Here is a simple explanation on laser printing.  Open up your printer and pull out the toner cartridge and look in the top for the charge roller and the bottom for the transfer roller.  Basically the toner is moved from the “hopper” to the drum and then to the paper.

We can break the printing process down into 4 steps: Charge, exposure, transfer & cleaning.
First there is the charge. In this step the drum is electrostatically ‘erased’

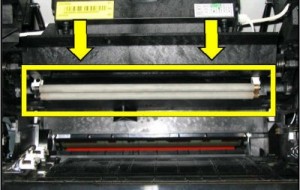
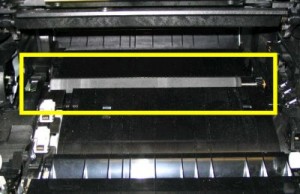
Charge roller is visible when the toner cartridge is removed and drops down from above the cartridge.

Charge roller is visible when the toner cartridge is removed and drops down from above the cartridge.

by the charge roller while it rides right on the drum.  Once it’s fully erased it can be exposed.

The drum is exposed by the laser beam drawing an image on the drum.
Quite simply, wherever the laser hits the drum, toner is attracted to that spot. The drum continues to revolve as it’s passed close to the paper.

Lexmark T series transfer roller

The transfer roller sits below the toner cartridge

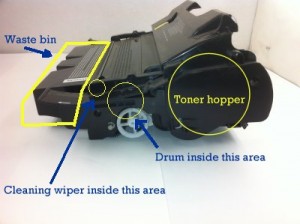
Once near the paper, the third step occurs: transfer. Toner is transferred from the drum to the paper. The transfer roller sits under the paper with a strong opposing electrical charge and pulls the toner from the drum and onto the paper. The drum continues its revolution and is cleaned internally by a wiper and any excess toner is wiped off and deposited into the waste bin.

Now, here is where the problem occurs. When the transfer roller gets worn out, less toner makes its way on to the paper and toner left on the drum is cleaned off. The result is that more toner is going into the waste bin during the cleaning wipe.

Lexmark T series cartridge

Diagram of Lexmark T series cartridge parts

Why does the waste bin become full?  Well, there is a limited amount of space in the waste bin and once this bin is full, it has no other place to go and begins to dribble out.  When a transfer roller is new your prints will be very dark, crisp and will transfer nearly 100% of the toner from the drum to the paper. Over time the roller will wear out and less toner will get transferred to the paper and will be wiped off the drum with each revolution and end up in the waste bin.  One solution is to keep your transfer roller fresh. If you see lighter copies, change the transfer roller right away. Try switching from the extra high yield cartridge to a lower yield cartridge.  Here is an example: If you are using a 32,000 page extra high yield cartridge the waste bin on this cartridge is exactly the same as one found on a 21,000 page cartridge. More prints means more waste so you may be more likely to fill the waste bin inside a 32K if your transfer roller is only transferring 70%-80% than with a 21K.

You can order roller kits for your Lexmark T series printers here
Maintenance kits contain the transfer roller and can be ordered here

by:  Thomas Braeger